
Solving Puzzles: Imperial Gardens Remnant 2
The Imperial Gardens Remnant 2 presents seasoned players with a complex environmental puzzle to solve. A labyrinthian challenge requiring observational skills and critical thinking is buried beneath the beautiful but deadly blooms. This comprehensive guide will explain how to decipher and conquer Remnant 2’s Imperial Gardens puzzle step-by-step.
Introduction to Imperial Gardens Remnant 2
Imperial Gardens Remnant 2 is an overgrown jungle realm rich with vibrant flora, foreboding fauna, and ancient ruins. Located in the treacherous Rhom region, this sprawling zone bombards players with lethal enemies and environmental hazards around every corner.
But for players who brave the Gardens’ threats, an actual test of skill awaits at its heart – a dense overgrowth maze housing the CankerRoot. Solving this claustrophobic puzzle and defeating the CankerRoot boss allows access deeper into Rhom. However, the secrets of the Gardens’ convoluted mystery initially prove confounding.
This guide will uncover solutions to the Imperial Gardens’ tricky puzzle, room by room. Follow along to master the maze and claim the CankerRoot’s powerful Devastator mod reward.
Read More About Crafting a Starship from Scratch: A Guide to Shipbuilding in Starfield.
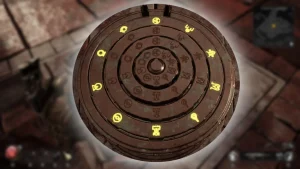
Mapping Out the Imperial Gardens’ Labyrinth Structure
The first step in solving any maze is understanding its layout. Here is a high-level overview of the Imperial Gardens Remnant 2 puzzle structure:
- A central Hub Room with multiple numbered gates on each side
- Four branching puzzle rooms, labelled 1 through 4, each accessible from the Hub
- Interconnecting tunnels linking rooms 1, 2, 3, and 4 in a loop
- Locked gates block each connecting tunnel until puzzles are solved
- Defeating the CankerRoot boss in room 4 opens the exit.
This circular layout may seem dizzying at first. But methodically solving each puzzle room’s challenge unlocks the next, allowing players to loop around to the CankerRoot for victory. Now, let’s break down solutions for each step.
Solving Puzzle Room #1
Entering from the central Hub, puzzle room #1 presents a grid of raised platforms over electrified water. Each platform lowers if stood on for too long, forcing quick movement. To proceed, players must:
- Cross-platform stepping stones quickly before they lower
- Follow the pattern shown on the wall, matching symbols to platform order
- If you fall, return to the start and carefully follow the path again
- Activate the switch to open the gate once all platforms are crossed
Memorizing the precise path is essential. Referencing the symbols mid-route helps guide you through this tense platforming test.
Overcoming Puzzle Room #2’s Toxic Tunnels
Connecting Puzzle Room #2 contains deadly gas-filled tunnels. Equip a Toxic Resistance mod to reach the next room safely. Stay out of the tunnels, or the fumes will overwhelm defences.
Activating buttons in room #2 exposes a sheltered path through the poison clouds to the far gate.
Players must:
- Press 4 numbered buttons in the correct order shown on the rear wall
- Follow the newly opened safe path through the tunnels when buttons are pressed
- If the route closes, return to reset the controls and try again
- Time movement carefully to avoid being trapped in the deadly haze
Quickly pressing the buttons in proper order reveals the route through room 2’s toxic maze.
Solving the Scaling Tests in Puzzle Room #3
Room #3’s challenge revolves around scaling walls and dealing with varied gravity conditions:
- The right fence requires wall scaling moves to ascend before time expires
- The far platform demands long jumping across a lethal pit
- The ceiling area flips gravity, needing careful platform navigation
- Finally, the wall runs under floating platforms to reach the far door
This room evaluates advanced movement techniques – so don’t hesitate to use abilities like the Evade skill for the long jump and distance on wall runs. The exit gate opens once all sections are crossed.
Bypassing the Laser Barriers in Puzzle Room #4
The final puzzle challenges players to weave between moving laser barriers to activate another button sequence. Here are the steps to safely navigate:
- Time movements to slip through gaps in the deadly grid of lasers
- Avoid stepping on floor panels, which trigger more lasers
- Press the four buttons on the rear pillars in the displayed order
- The lasers deactivate once the buttons are pressed correctly
With swift reflexes, you can thread through the lasers and press buttons to unlock the path to the CankerRoot.
How to Defeat the Boss in Imperial Gardens Remnant 2
The Imperial Gardens Remnant 2 is one of the trickiest boss fights you’ll encounter in Remnant 2. This lush area is guarded by a dangerous boss who will require patience, skill and the right strategy to take down.
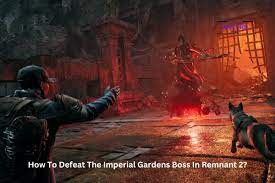
In this guide, I’ll walk you through how to defeat the Imperial Gardens Remnant 2 boss using tips from expert players so you can progress through this challenging area.
Getting to the Gardens
Before you can battle the boss, you must navigate the gardens themselves. The Imperial Gardens Remnant 2 is located in the Rhom realm, accessible after activating the Channeler’s Key.
The gardens are filled with Reanimated and Root Brutes that will try to stop your progress. Stick to the stone paths as much as possible – venturing into the grass will slow you down, making you vulnerable. Don’t forget to watch for loot chests and resources as you go.
When you reach the end, interact with the giant glowing stone to trigger the boss fight. Be sure you are rested and healed up and have any buffs or consumables ready before initiating the encounter.
Boss Attack Patterns
The Imperial Gardens Remnant 2 boss is a large creature named Ixillis XV. According to experienced players, this boss has two phases with different attacks you’ll need to look out for:
Phase 1:
- Dive Bomb – Ixillis will fly high up and pick a target area to dive bomb, dealing area damage. Move away quickly.
- Vomit Blob spits a giant, slow-moving blob that will trail you and explode for heavy damage. Keep your distance from it.
- Seed Spit – Rapidly spits seeds at you for low damage. Strafe or take cover during this attack.
- Vine Whip – Thrashes vines wildly around the arena that deals moderate damage. Focus on dodging over dealing damage here.
Phase 2:
- At 50% health, Ixillis will split into two separate creatures. Their attacks are similar but now come from two sides.
- Screech – Both bosses will scream, summoning roots from the ground that will damage and entangle you. Sprint to avoid them.
- Dual Dive Bomb – The two creatures will both take to the air for coordinated dive bombs. Use cover, as this is very hard to dodge.
- Vomit Barrage – They will each spit multiple vomit blobs in sequence. Don’t let yourself get boxed in!
Gear and Mod Recommendations
Having the right loadout can help against a demanding boss like Ixillis. Here are some recommendations from experienced Imperial Gardens Remnant 2 players:
Weapons:
- Hunter’s Mark / Eye of the Storm – Strong burst damage options to use when Ixillis is vulnerable.
- Beckon / Particle Accelerator – Help deal steady DPS from a safer distance.
- Hot Shot / Breath of the Desert – Great to apply fire DoTs. Ixillis is weak to fire.
Armor:
- Leto’s Armor – Excellent for tanking hits, thanks to damage reduction and increased poise.
- Radiant Armor – Provides bonuses to elemental damage to exploit Ixillis’ fire weakness.
- Twisted Armor – Improves mobility for dodging attacks.
Amulets:
- Gunslinger’s Charm – More damage on ranged weapons to poke safely from afar.
- Braided Thorns – Reflects some damage while you focus on dodging.
- Devil’s Covenant – Trade health for stamina to keep attacking longer.
Mods:
- Hot Shot – Adds bonus fire damage to better exploit the boss’s weakness.
- Corrosive Aura – Constant DoT effect helps whittle down the bosses.
- Howler’s Immunity – Grants short immunity to scream attacks.
With gear emphasizing firepower, defence, mobility and damage over time effects, you’ll be able to endure this lengthy battle and defeat Ixillis for good.
Strategy and Tips
Now, let’s pull together a strategy based on the attack patterns and recommended loadout:
- In Phase 1, keep your distance and use ranged attacks during Seed Spit and Vine Whip. Dodge all dive bombs and vomit blobs.
- When Ixillis takes to the air, sprint or roll away as it comes in for a dive bomb.
- Walk away from slow-moving vomit blobs to avoid getting trapped. Don’t let yourself get cornered!
- In Phase 2, position yourself so both bosses are on one side. Don’t get surrounded!
- Burst down one boss quickly with Hunter’s Mark or Eye of the Storm to reduce incoming attacks.
- Take cover behind pillars during the dual dive bomb – it’s tough to dodge.
- Save stamina, boosting consumables for Phase 2 when avoiding is crucial.
- Keep applying fire damage over time from Hot Shot and fire weapons to wear Ixillis down.
With patience and these proven tips from experienced players, you can eliminate the dual Ixillis XV bosses and move deeper into Rhom. Stay alert, keep moving, and maximize fire damage; you’ll conquer this tricky foe.
The lush but deadly Imperial Gardens Remnant 2 hosts the most intense boss fights. Use the strategies outlined here to gear up and claim victory over Ixillis XV. The quick reactions and focused fire needed will hone your skills for future challenges. Once you finally defeat this formidable foe after a gruelling battle, you’ll be ready to push further on your journey.
Mastering the Mazes of Imperial Gardens Remnant 2
While positively labyrinthian at first glance, Imperial Gardens Remnant 2 contain puzzles that yield to observant players. The route through this complex and deadly maze opens up by carefully solving challenges room by room. Once the patterns and solutions are mastered, besting the CankerRoot boss becomes a matter of execution.
So study the details and conquer the Imperial Gardens’ multifaceted puzzles. The satisfaction of unravelling Remnant’s deadliest maze is a rewarding experience that no seasoned player should miss. Stay light on your feet, keep your eyes peeled, and the Gardens’ secrets will bloom before you.
The strategies and tips within this guide aim to shed light on navigating this overgrown obstacle course with skill and efficiency. Master its puzzles, and the Devastator mod power awaits. So steel your mind, ready your trigger finger, and unravel the Imperial Gardens’ captivating mysteries. Glory and treasure deep in Rhom’s darkest recesses beckon to those clever enough to decipher the path forward.
Also, Read More About The Remnant 2 Supercharger Mutator: Power Surge.
Author Profile

- We Are A Team Of Gamers, Content Creators, And Industry Experts Who Have Dedicated Our Lives To The Gaming Universe. Our Diverse Backgrounds And Gaming Preferences Ensure That Our Content Appeals To Everyone, From Casual Gamers To Hardcore Enthusiasts. We Believe In The Power Of Gaming To Unite People, Promote Creativity, And Challenge The Boundaries Of Entertainment
More Articles
 GuidesOctober 18, 2023Remnant 2 Postulants Parlor: Find Secrets and Mystery Behind Bottom Left Door
 GuidesOctober 17, 2023Remnant 2 Master Portal Key: How to find the Key and How to Use it
 GuidesOctober 17, 2023Remnant 2 Phantom Wasteland: How To Unlock Hatchery Locked Door
 GuidesOctober 17, 2023Remnant 2 Butcher’s Quarter Secret: Find the Secret about the Hanging Man